When submitting documents for digital identity verification, it’s essential to provide clear and accurate images to ensure your information can be validated without delays. Poor-quality photos, missing details, or improper angles can lead to rejections or failed verification attempts. The following guidelines will help you capture high-quality images of your identification documents, ensuring they meet the necessary standards for secure and efficient processing.
General Best Practices
- Use a High-Quality Camera
Use a smartphone or camera with at least 8MP resolution. Avoid using front-facing cameras if possible. - Ensure Good Lighting
Take the photo in a well-lit environment with natural light or soft white light. Avoid harsh shadows or glares. - Avoid Filters or Edits
Do not enhance, crop, or edit the image in any way. Upload the raw, original image.
How to Photograph the Document
- Place on a Flat, Dark Background
A contrasting surface (e.g., a black table for a white document) helps make the document more readable. - Capture the Entire Document
All four corners of the document must be clearly visible. No edges should be cut off. - Keep the Document Flat and Still
Avoid bending, folding, or tilting the document. Hold it flat or place a small object on the corner if needed. - Take the Photo Straight On
Position the camera directly above the document, not at an angle, to avoid distortion. - Focus Clearly
Make sure all text, numbers, and photos on the document are sharp and readable. Tap on your screen to focus if needed.
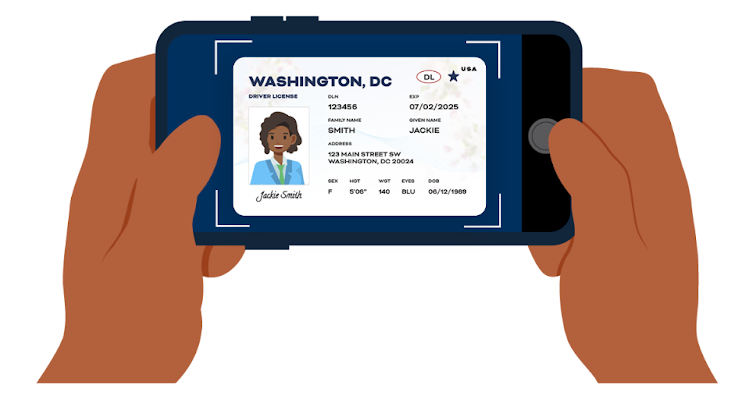
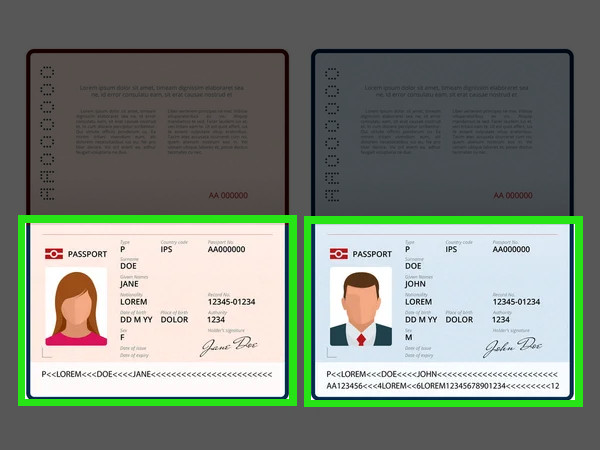
Visual Examples

ID Specific Requirements
- No Obstructions
Nothing should cover any part of the document (no fingers, tape, glare, or shadows). - Document Must Be Valid
The document must be current (not expired), official, and government-issued.
Common Mistakes to Avoid
- Blurry or pixelated images
- Images taken at night or in poor lighting
- Cropped or zoomed-in photos
- Angled or skewed images
- Flash reflection on shiny surfaces
- Using scanned copies or screenshots